Integrate AWS Data
Time to complete: ~10 minutes
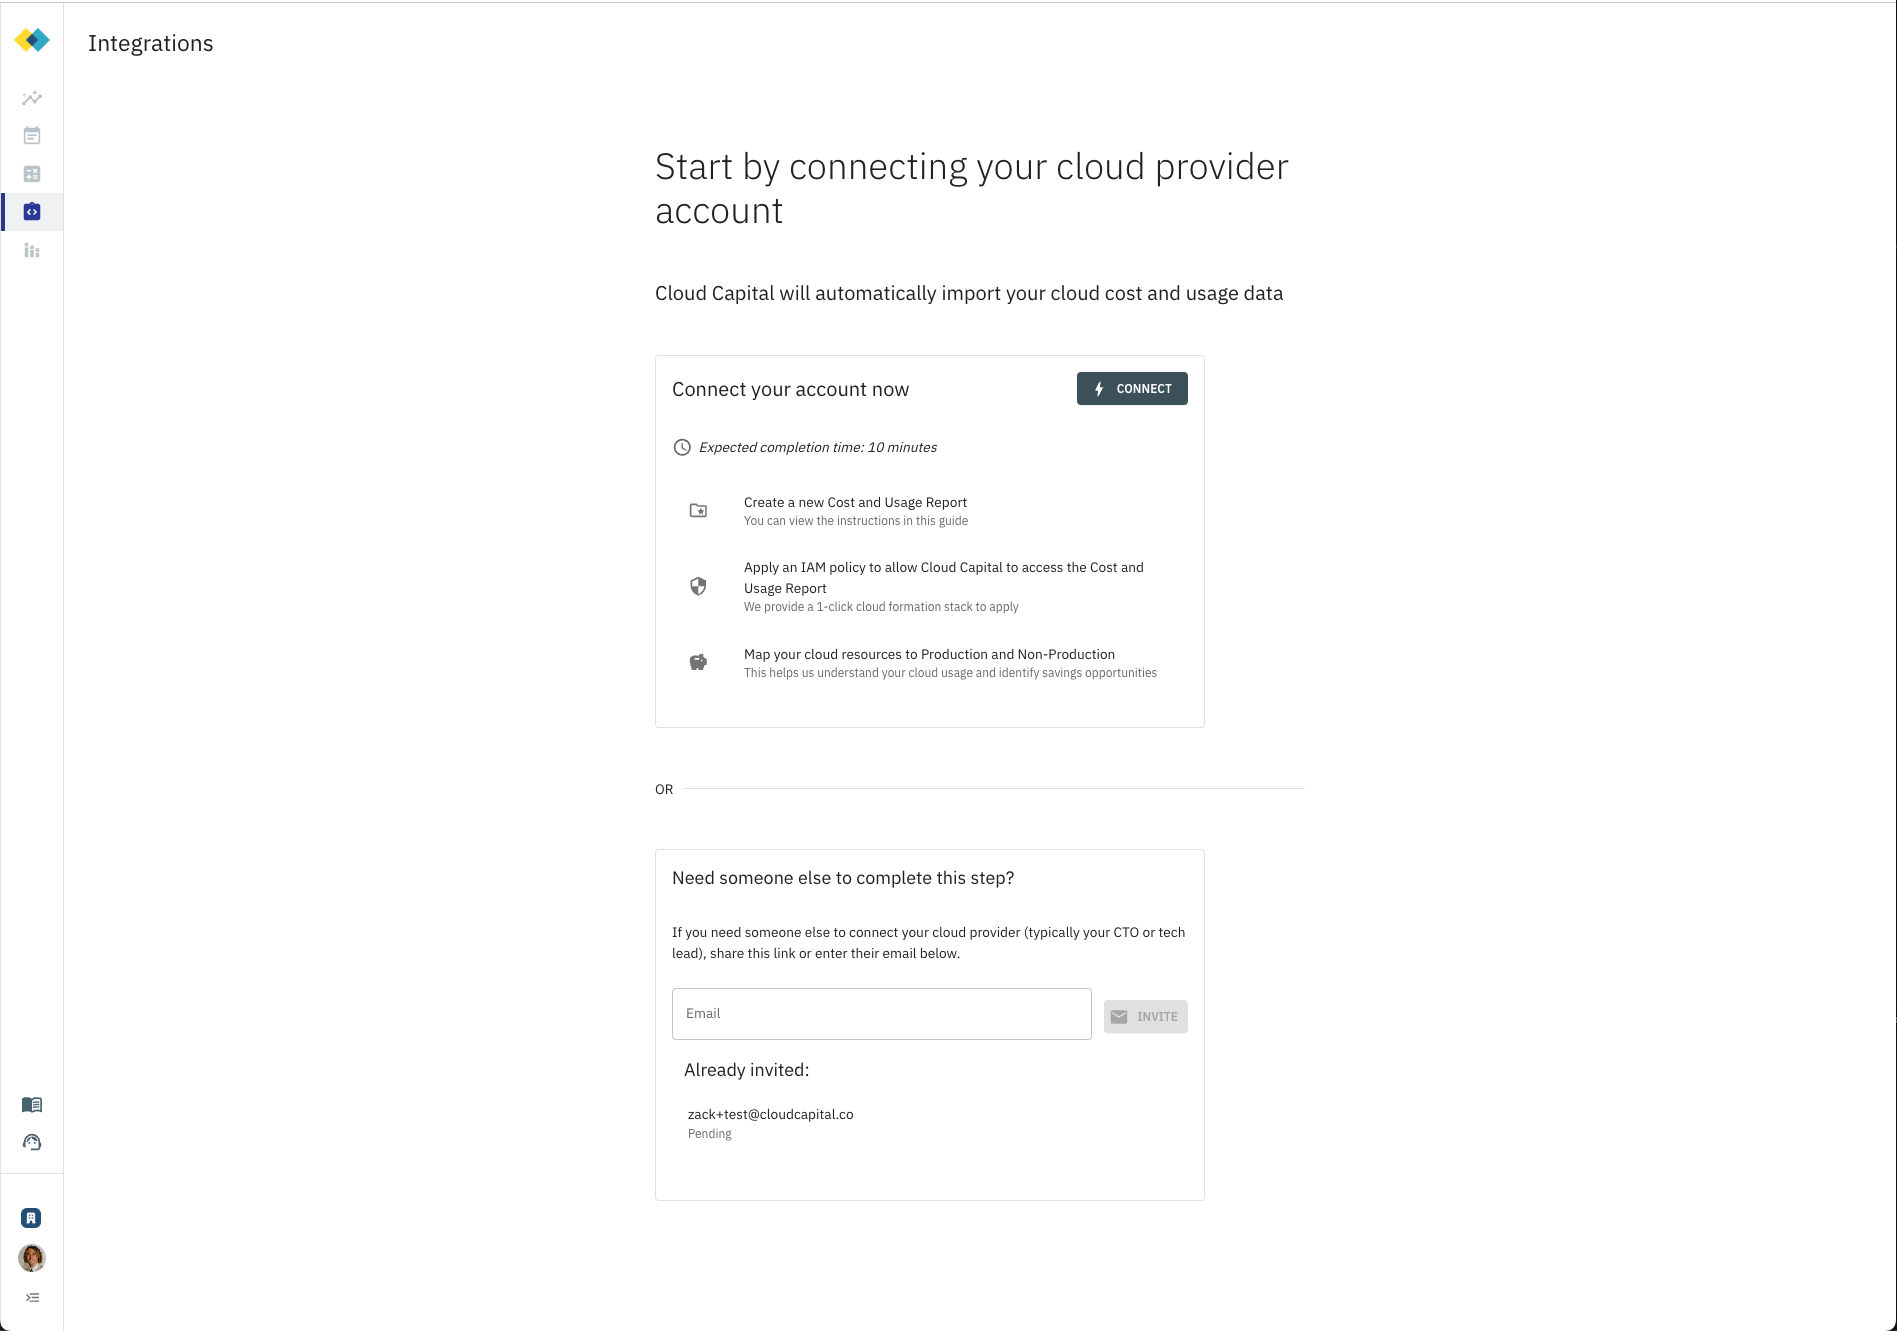
Goal: Connect your AWS Cost Data to Cloud Capital
The first step is to connect your cloud cost and usage data to Cloud Capital. To do this, we will import data from the AWS Cost and Usage Report and AWS Cost Explorer.
Instructions
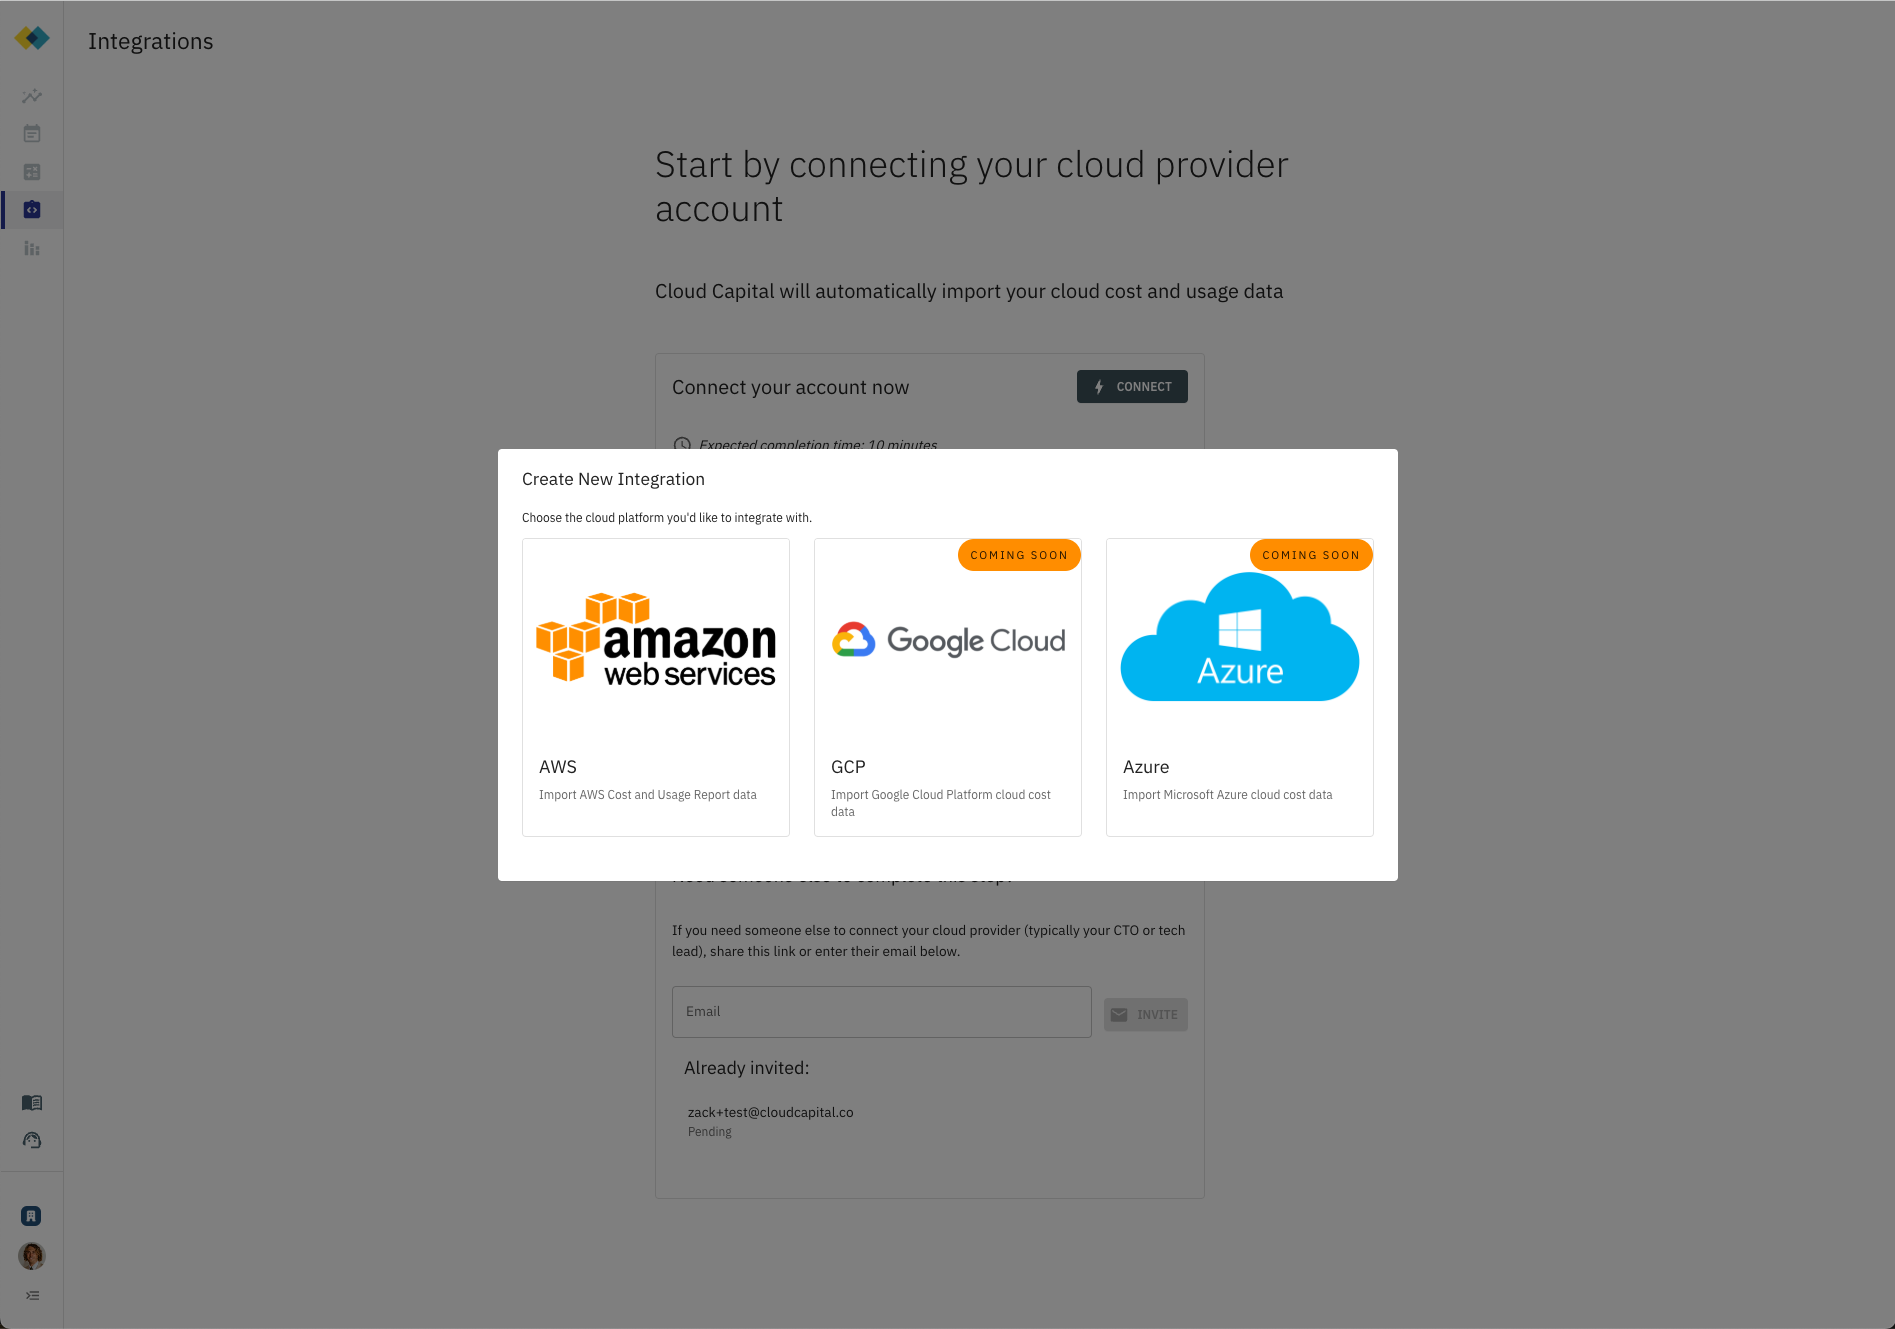
Step 1: Create a new Integration in Cloud Capital
- While logged in to the Cloud Capital application, navigate to Integrations
- Click “Connect”
- Choose “AWS”
- Give your new Integration a descriptive name
Step 2: Create a cost data export in AWS
This step will walk you through creating a cost data export in the AWS Billing and Cost Management portal. You will enter the output from this step into the Cloud Capital Integration settings.
Advanced: If you already have a daily export running, you can verify the settings are the same and use the existing bucket in the next step. If you aren’t sure, please continue with this step.
- In the AWS console, navigate to “Billing and Cost Management”
- Click on “Data Exports” on the left
- Click “Create”
- Select “Standard data export”
- Give the report a name (ie. cloud-capital-cost-export) and do not modify the other settings.
Note: You will enter the name you chose in the Cloud Capital application.
- Click “Next”
- In Data table content settings choose:
- Include resource IDs: no (leave box unchecked)
- Split cost allocation data: no (leave box unchecked)
- Time granularity: Hourly
- Column selection: keep the default (i.e. 114/114 columns – accounts may differ slightly)
- In Data table delivery options choose:
- Compression type and file format: Parquet - Parquet
- File versioning: Overwrite existing data export file
- In Data export settings choose:
- “Configure” and “Create a bucket” (recommended) or select an existing bucket (advanced)
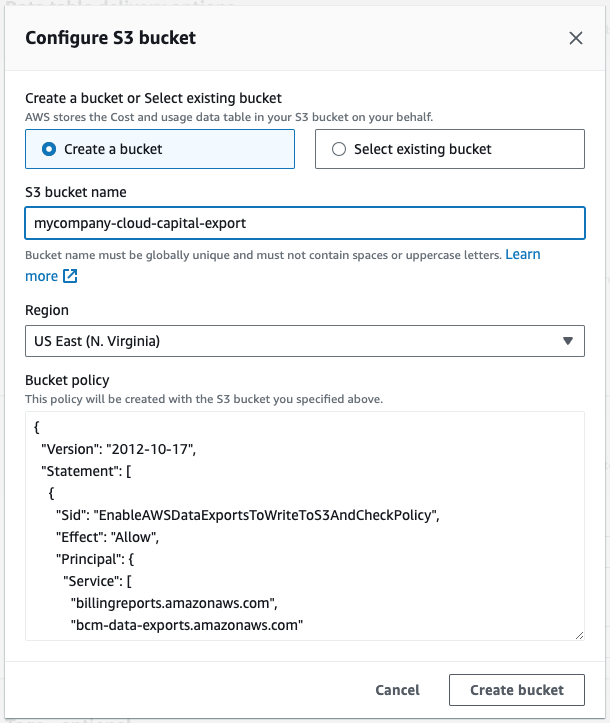
- Add a s3 path prefix of “hourly-export”
Note: You will need to enter the s3 destination (bucket name + path prefix + export name) in the Cloud Capital application. You will be shown the S3 Destination field directly upon creating the report. You can copy and paste this value.
- You should now be able to view the created Cost and Usage report.
Step 3: Add cost data export settings to Cloud Capital
- Click “I HAVE ENABLED THE COST DATA EXPORT” to confirm you have completed the step above.
- Copy and paste the
Bucket Name,Path Prefix, andExport Namefrom Step 2 into the Integration settings
Step 4: Create an IAM policy
The purpose of this step is to grant CloudCapital access to the cost data you created in the previous steps.
- Under “Create IAM Policy”, click “Run Cloud Formation Stack” to run the provided Cloud Formation stack. This generates an IAM policy to give Cloud Capital access to the bucket from the previous step.
Note: you can review the policy that will be created after clicking the link.
- Click “I HAVE RUN THE CLOUD FORMATION STACK”
- Once the policy has been successfully created, the AWS UI will provide a Role ARN. Enter this Role ARN.
Step 5: Test and Enable your integration
Click “Test Connection” to verify that Cloud Capital can access the bucket you provided.
If the connection is successful, you can change the Integration Status to “Enabled”.
Click “Save & Continue” to activate this integration.
Congratulations! You have completed AWS Data Connection and can proceed to Resource Mapping.
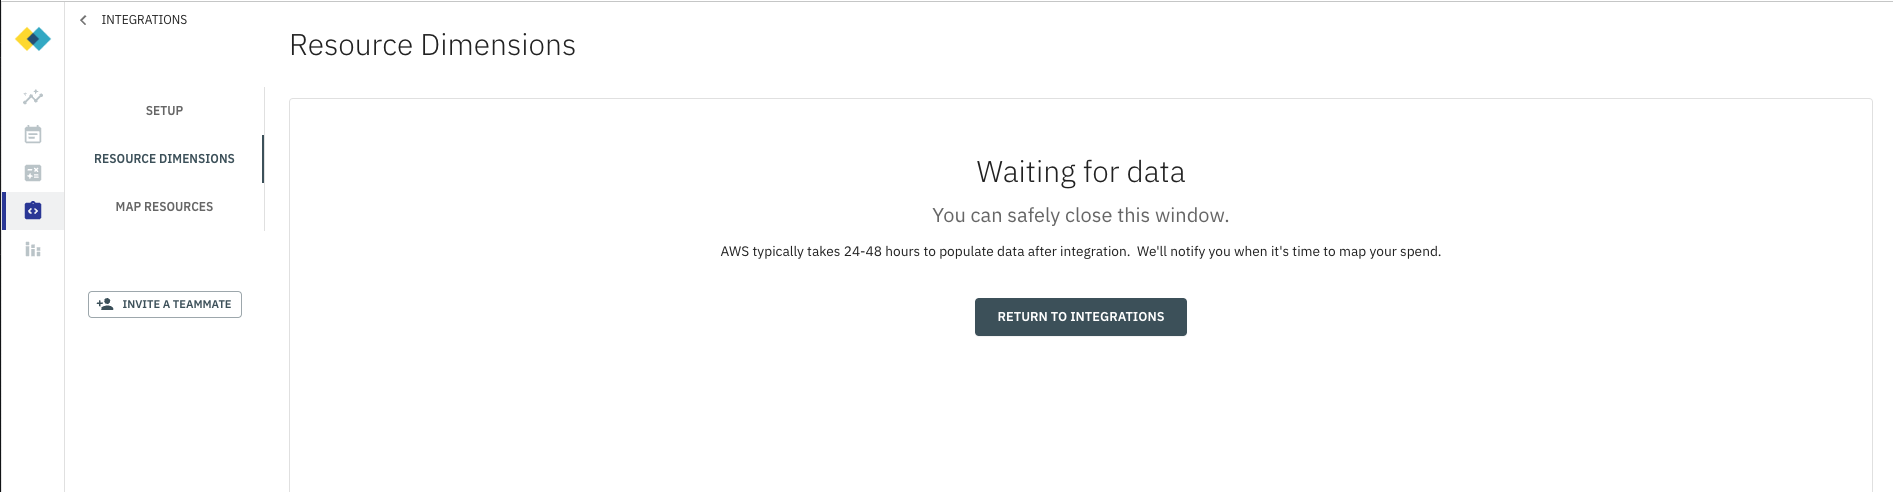
Note: AWS typically takes 24-48 hours to populate the Cost and Usage Report. After 24 hours, you can return to the Integration settings to verify that data is being imported and proceeed to the next step.