Account Transfer
In order for Cloud Capital to purchase commitments on your behalf, it is necessary for your AWS account(s) to join the Cloud Capital billing group. Cloud Capital will provide an “Account Transfer Checklist” for your review before conducting a video call walkthrough of the Account Transfer with a Cloud Analyst.
While Cloud Capital becomes the payer of record for your account, we do not access your Cloud Infrastructure or Customer Data (for more information see our Legal/Security terms).
Instructions
Step 1: Complete “Account Transfer Checklist”
- Your Cloud Capital Account Manager will send you an “Account Transfer Checklist” in preparation for the move, confirming:
- A full list of the AWS Accounts with Account IDs.
- Your AWS support plans per Account.
- A full list of Services at the Organization level that are enabled. This can be found here: https://us-east-1.console.aws.amazon.com/organizations/v2/home/services (sort for enabled services)
- There are no outstanding bills or issues in any of these AWS Accounts.
- Any service limits that have been increased. This can be found here: https://us-east-1.console.aws.amazon.com/servicequotas/home/requests
- You have downloaded any specific Cost & Usage Reports you require.
- Validate that the structure of the forecast (Resource Hierarchy and Resource Mapping) is complete.
- Once you have completed the checklist, please send it to onboarding@cloudcapital.co, our Cloud Analyst will be in touch to arrange a call and walk you through the Account Transfer.
Step 2: Create a Purchasing Account within AWS and Install Role for Purchasing
- Create a new Account in AWS, this will contain all commitments Cloud Capital purchase on your behalf.
- Information can be found here: https://docs.aws.amazon.com/accounts/latest/reference/manage-acct-creating.html
- Create a new integration for this account. Go to Cloud Capital App, and install a role for Cloud Capital to be able to purchase commitments on your behalf.
Step 3: Initiate Account Transfer to Cloud Capital
The Account Transfer will be covered live on a call with your Cloud Analyst. The person on the call must have Root access to the account to be able to accept invites.
- Detach all linked accounts from their current AWS Organization.
- Ensure each Account has a valid payment method and billing information, including your newly created Purchasing Account.
Note: AWS requires each account to have valid billing information.
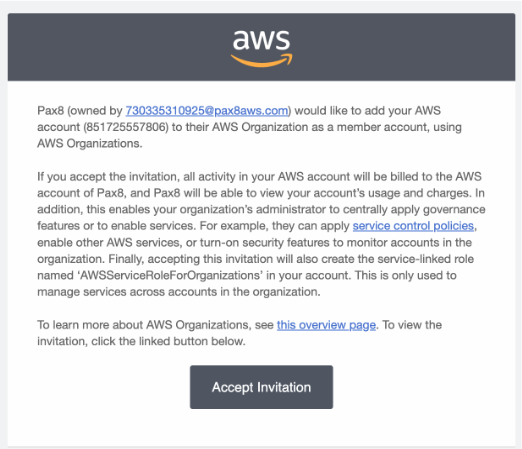
- Check your email for the invitation to move your account.
Note: Look for an email From: Amazon Web Services no-reply@amazonaws.com Subject: “Your AWS account has been invited to join an AWS organization” Content: “Pax8 would like to add your AWS account to their AWS Organization as a member account, using AWS Organizations”.
- Click “Accept Invitation” on the email.